Showing posts with label in the kitchen. Show all posts

Thursday, September 30, 2010

can you guess?

That's not an avocado...

THIS is an avocado!

DSC_2130

Actually, they're all avocados. The ones on the right are the small/normal sized ones we're used to in Canada. The ones on the left are AVOCADOS ON STEROIDS. From what others have told me, the large (huge) ones are more mild tasting and nice for things like guacamole. 

I thought they were melons.

Friday, September 17, 2010

room with a view

For having been in Bogota almost two weeks, I haven't spent much time describing our new life here. So here are a few tidbits...

the neighbourhood:
  • In our neighbourhood, there is a crazy mix of homes with VERY traditional Spanish colonial architecture... sitting right next to the most stark, uber modern homes you've ever seen. There is no such thing as a developer buying up a whole neighbourhood and building cookie-cutter homes. EVERYTHING here is custom. From the home itself to the garage door to the sidewalk outside the home. I love it.
  • Most appliances here run on natural gas, but homes don't seem to have natural gas lines. Instead, trucks come by, stopping every few houses and ring a bell on the back of the truck. It's full of huge tanks (think the size of those big helium tanks at party stores) that they exchange the empties for full ones. The other day, I saw the poor guys who have to unload these giant gas tanks from the bed of a truck... did not look like easy work.
  • Everywhere I look, I see these amazing terracotta pots. They're huge and thick and worn and have this age and patina to them... they're everywhere. On balconies, in patios and courtyards, flanking doorways, lining walkways... and they're full of the most amazing plants. A few I recognize, but most are totally new to me. I want some. Both the pots and the plants. Our balconies (yes, we have two) are bare and bleak and boring. I want to be part of the Big Beautiful Terracotta Pot Club.

the food:
  • Groceries here are so expensive! A 200g box of cereal is about $5, as is a small jar of pickles. A can of coconut milk (around $2 back in Canada) is over $4 here. And I paid almost $10 for a small jar of feta cheese! Bread, condiments, and dairy products are also about twice the cost of similar items back home. 
  • Thankfully, fruits and vegetables are much more reasonable, especially given that most things that were expensive imports back home are locally grown here. Infact, I hardly recognize half the fruit at the stores. The other day the boys and I picked a few new fruits to try... with mostly amazing success... except for this thing.  I think it might have been a passionfruit. Whatever it was, it was AWFUL. I couldn't even swallow it. Maybe we weren't supposed to eat the slimy, greeny-orange gelatinous seed pod things, but I couldn't see a way to eat the skin. It was thick and hard. Either way, yuck. 
DSC_2392
does this look normal, Patrycja??
  • Most Colombians seem to drink ultra-pasteurized milk, at least that's what the huge aisle of un-refrigerated milk -compared to the tiny shelf of normal milk- would have us believe. Ultra-pasteurized milk?? Yeah, yuck. After finally finding a source of raw goat's milk in Gatineau, the thought of ultra-pasteurized milk makes me more than a bit squeamish. Unfortunately, the source of goat's milk we've found here is $4/L... almost four times what we were paying in Gatineau. Ouch.
  • Not food, but toys are soooo expensive. SO. EXPENSIVE.  For example, this Bobba Fett ship Lego set is $89.99 US or  $109.99 CDN at Toys R Us, and just under 500,000 Colombia Pesos at a local toy store. That's over $277 CDN and $270 US. More than twice as expensive! In retrospect, I'm thankful for the ridiculous  (for us)  amount we spent on costumes/art supplies/Lego/other toys before leaving Canada. It will save us a bundle for birthdays and Christmas.
our apartment:
  • Even though it's so empty that most rooms echo when we talk, we're really liking our new place. The windows are huge (the light is amaaazing), the rooms are big and the closets border on the obscene. 
  • The furniture we've been provide with here is really nice. Too nice. I'm not sure whether or not the person who did the shopping for us knew that we have kids, or if they've just never met the likes of our boys. In the handbook we were given it states that the life span of embassy-supplied furniture is assumed to be eight years... well after less than two weeks the dining room chairs ALL have stains, one of the love seats was thrown up on (and the cushions don't come off for proper cleaning... who makes a sofa like that??), and the dining room table has all sorts of little dents from the end of forks, etc. Eight years??  There's no way. This is clearly not the season of life for nice things.
  • We were supplied with a "Welcome Kit" of necessities to tide us over until our shipment comes. Included were bed and bathroom linens, a set of Corelle Ware dishes, some glasses, a few pots, basic cutlery... you get the picture. Well after 10 days, we've already suffered two casualties... a glass tumbler and a coffee cup. Welcome to life with three little boys.
  • We have our own water heater, but it takes sooooo loooong for hot water to reach any of the taps, especially the ones in the bathrooms furthest from the heater. I feel guilty every time I run the water, but there are some things that you just can't do with ice cold water. But I feel so wasteful.
  • Our kitchen has all stainless steel appliances AND stainless steel counter tops. While I think it looks pretty cool and the seamless countertop/skin is wonderfully easy to wipe crumbs off of, the brand new stainless appliances are not so wonderfully easy to keep clean. Sticky-fingered, running-nosed, dirty, slobbery boys LEAVE MARKS ON EVERYTHING. Is there a trick I'm not aware of??
  • We have so much empty wall space -huge expanses of gleaming white walls that we're not allowed to paint- that I'm at a loss over how to fill it up. We have a massive hallway that runs the length of our suite (think bowling alley and you'll be close) that I have no idea what to do with, in addition to the huge living room and the separate family room. And there's also the boys' room and play room. I want to do something fun in both those rooms, but am really struggling to decide on a theme (even a loose theme) that would suit all three ages (7, almost 4 and 20 months) but that isn't too corny... and isn't Lego or Star Wars... or Star Wars Lego. 
Now want to see a picture of our building complex??

Bogota sights19
that's Peter walking in the bottom right corner

Bogota sights20

Our floor is the second from the top. The balcony without any lovely terracotta pots is ours... the door off it leads to the TV/family room. The huge expanse of windows to the right is the living room, and to the left -next to the tree with the lovely yellow flowers- is the window to the master bedroom.

It's pretty, right?

We were a bit jealous when we saw the huge patios that the folks on the first floor have. It runs the whole length of that side of the building! But for security reasons, embassy staff have to be on the third floor or above. So we'll make do with the little outdoor space we have. We'll fill it up with terracotta pots full of hibiscus and jasmine vines (a smell I will forever associate with Colombia now... one of my favourite smells HANDS DOWN) and succulents and some of these crazy tall grass-like things that are really common around here...

Bogota sights07
these grow 6-7' tall! any idea what they are??

So yeah. All in all, life here is good so far. It'd be nice to be able to call and talk to my family and friends a bit more easily, and we will all be super excited when our shipment finally arrives (it should have been here by now, but some mix up with paperwork that needed to be completed has delayed things by about three weeks), but other than that we're settling in quite nicely. 

Thanks to those of you who are joining us on this adventure. It will be fun to share this next year with you all.

Oh and for those who are still wondering about the pictures I posted yesterday, THEY'RE FOR GARBAGE! People put their garbage bags in them and garbage is picked up several times a week. For something so... um, utilitarian... I find them really interesting and kind of pretty. 

Monday, May 17, 2010

rainbow cake: part II

This post is for all those wondering how I made the rainbow cake for the princess castle cake I did last weekend. It really wasn't hard, just took some steps. After mixing up the cheapest some simple white boxed cake, I divided the batter into six bowls and mixed a different food colouring into each bowl. Take note that I didn't use your grocery store brand liquid food colouring, but the professional icing colour gels meant for cake decorating (like these). While I'm not normally a fan of food dye (especially for kids), there's just no way to get these kinds of vibrant colours with natural dyes.

They're even brighter when cooked. Serious.

rainbow cake-1

rainbow cake-2
these pictures weren't edited at all (not even white balance... ugh. sorry.)

It would've been better to bake each colour individually so I'd end up with six half cakes, but I only had to round pans and I didn't feel like spending all afternoon in the kitchen, pouring, filling, levelling, baking, cooling, removing, re-greasing, re-pouring... you get the picture. So instead I did two colours per pan. Below you can see a bit of the first colour peeking through around the edges.

rainbow cake mosaic I

Since two boxes of cake batter should have made four cakes, but I was only using three, I didn't want to fill the pans right up for fear of cleaning -albeit cheerfully coloured- cake batter out of the bottom of the oven. I used the leftover batter to make a square cake, pouring each layer into the pan as evenly as possible. I thought I might need this extra cake to build/repair parts of the castle, or if we needed extra cake for extra people, but ended up taking it to church where it was inhaled by some very excited, very amazed 3-9 year olds.

rainbow cake mosaic II

rainbow cake-10
messy and pretty at the same time

Melo's 4th bday-44Melo's 4th bday-8

The layers of rainbow cake made up the main body/section of the castle, while the towers were made of rice krispie treats. All in all, it was, yes a bit of work, but also a huge success. 

Sunday, May 16, 2010

almost as good as my Lego Star Wars cake

(If you didn't read about the ridiculous amount of time I spent making Liam's Lego Star Wars' Clone Wars Commander Fox cake last year, here's the link.)

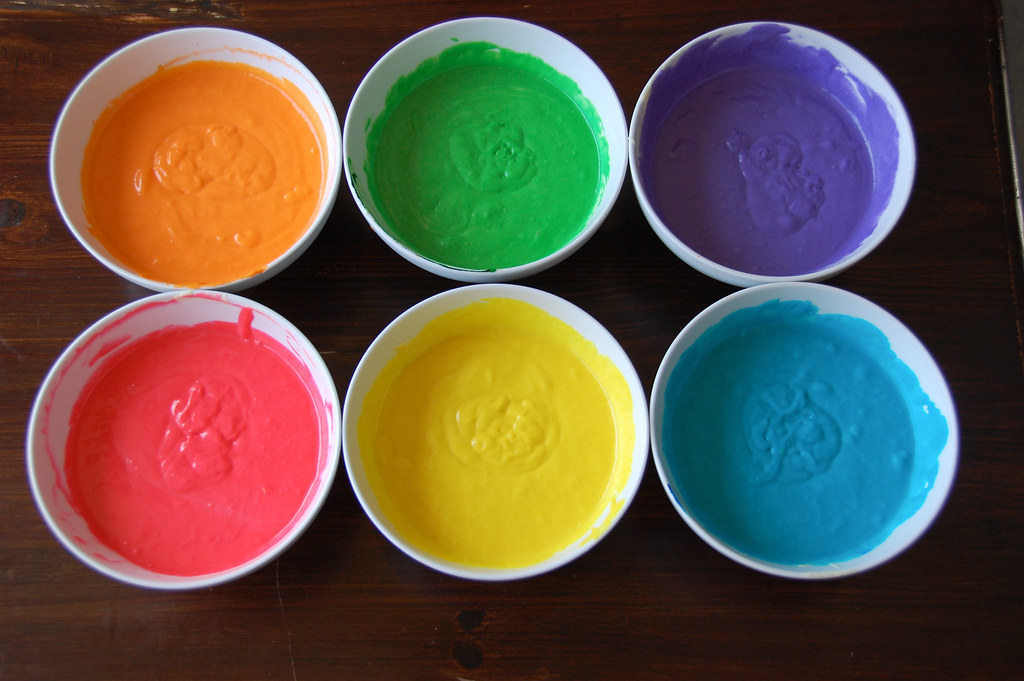
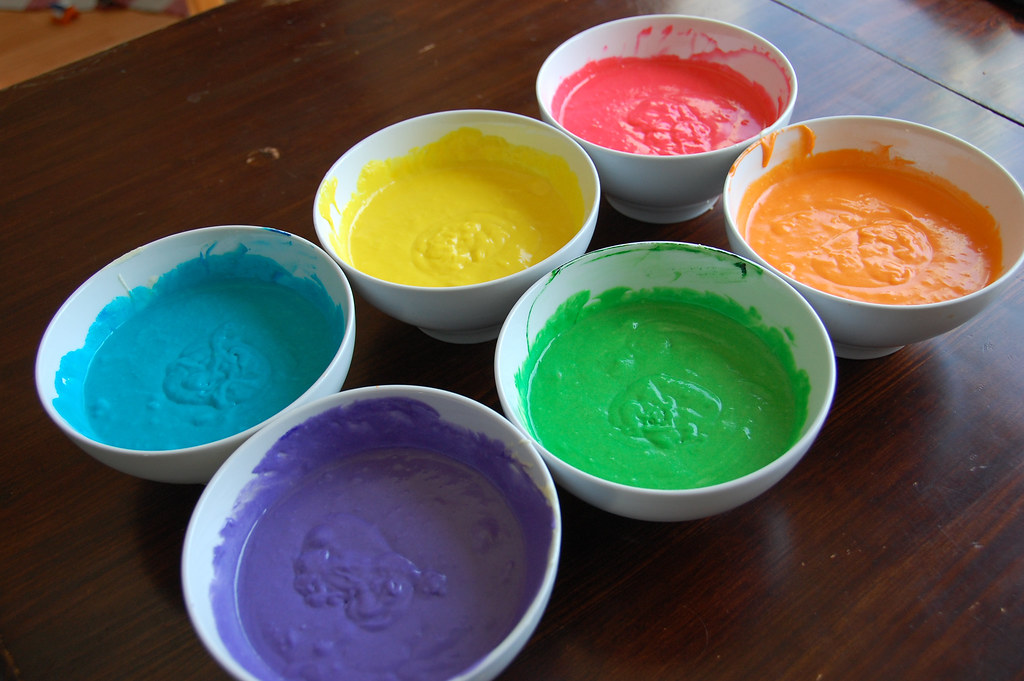
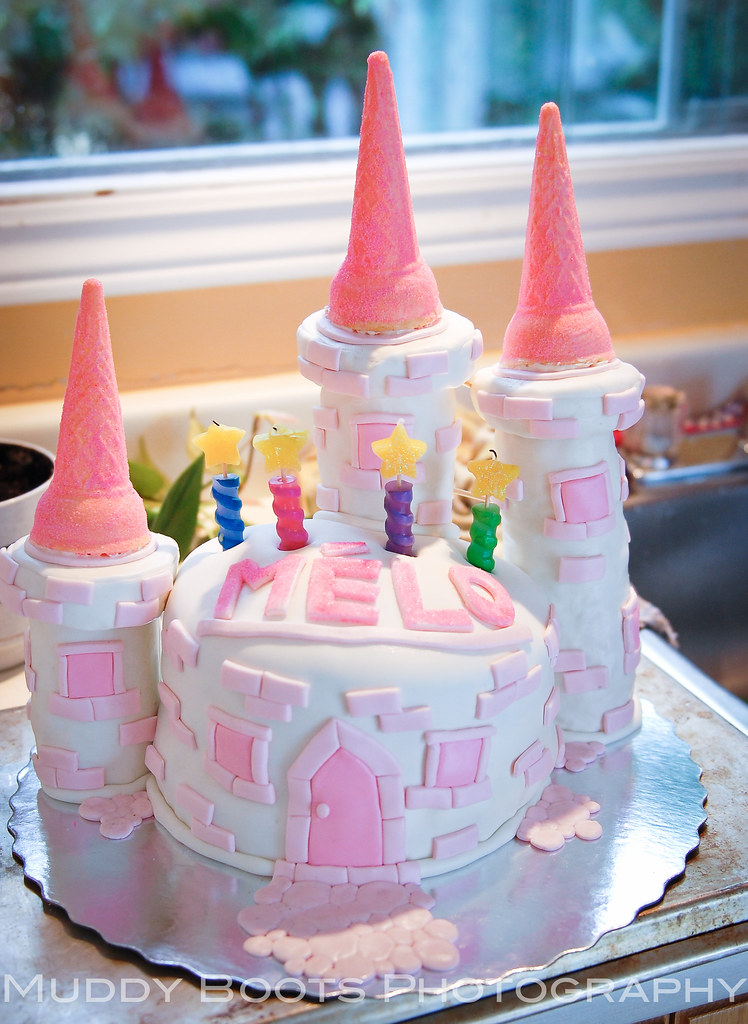
I didn't bother with all the step-by-step pictures I did with the Star Wars cake, partly because it was late, partly because I was lazy, but also because I didn't have a clear idea of what it was going to look like when finished. I started out with a three layer round cake, made some rice krispie towers and went from there.

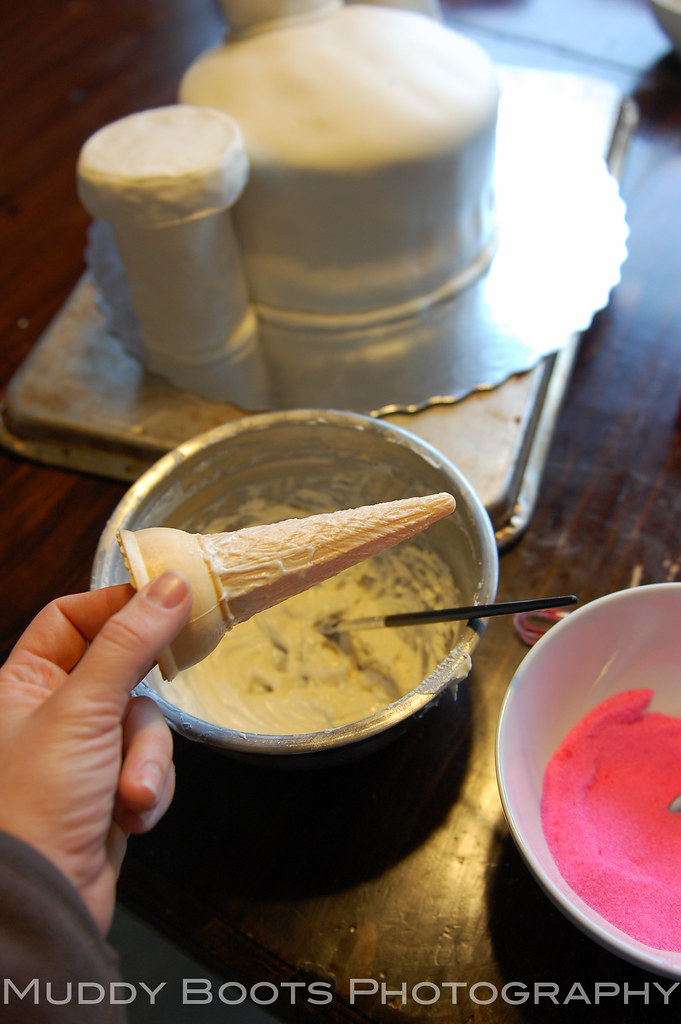
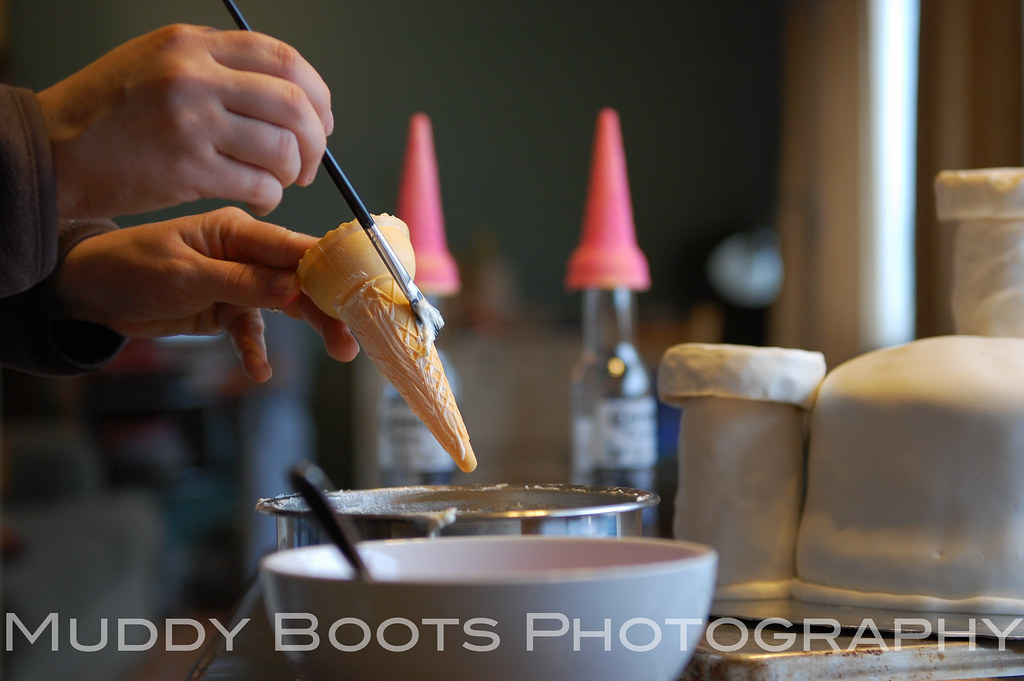
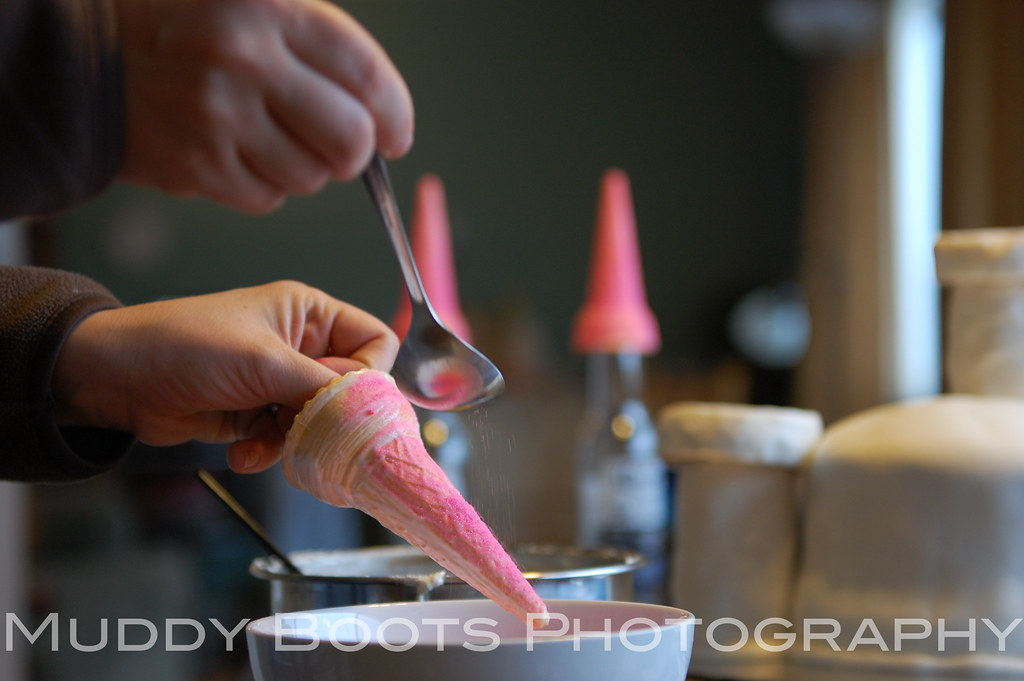
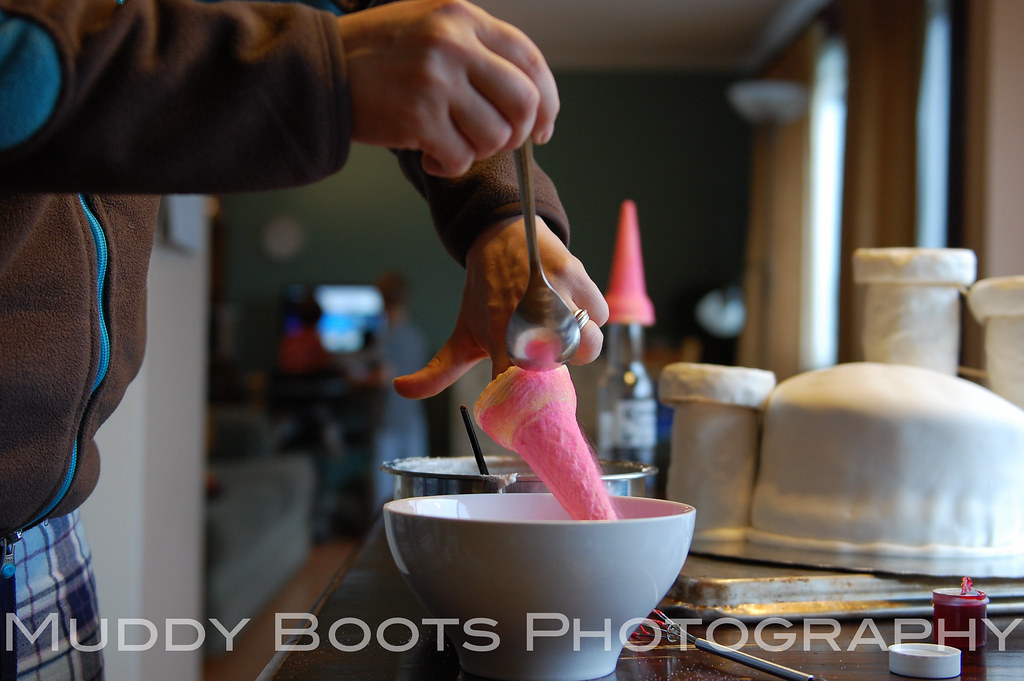
For the tops of the towers, I mixed some of the leftover icing with a bit of corn syrup then brushed three ice cream cones with the mixture,

Melo's 4th bday-50

 and covered them with pink-dyed sugar.

Melo's 4th bday-48

Melo's 4th bday-47

Melo's 4th bday-49

Melo's 4th bday-46
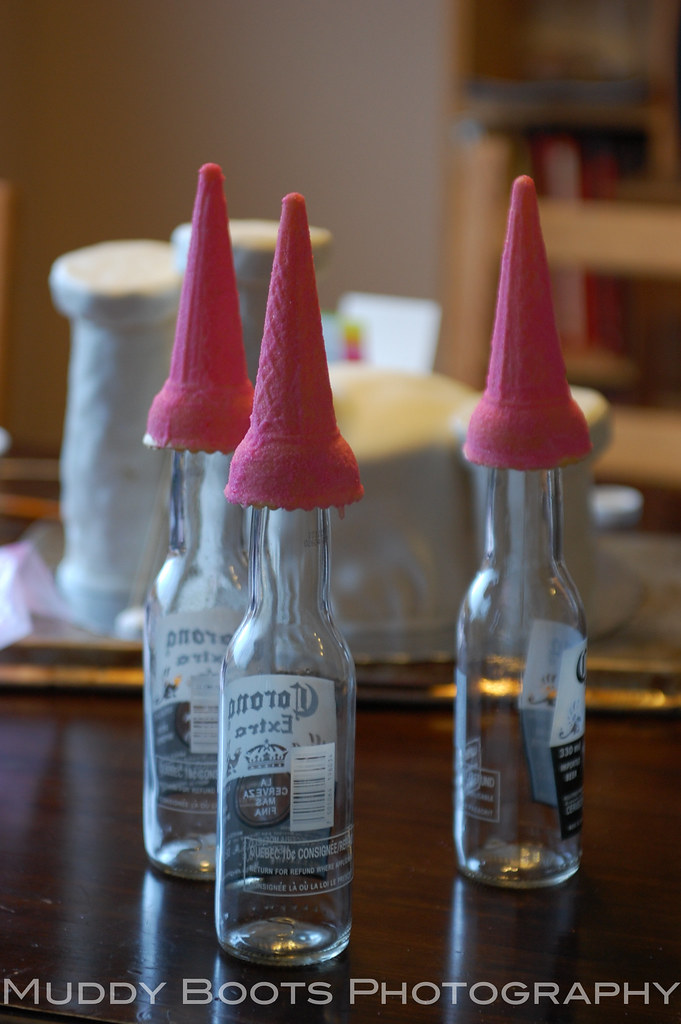
beer bottles made for an excellent drying rack

Having covered everything in white marshmallow fondant and decided on a final placement of the towers the night before, it was the final details that remained.

And I'm nothing if not a glutton for punishment when it comes to the details.

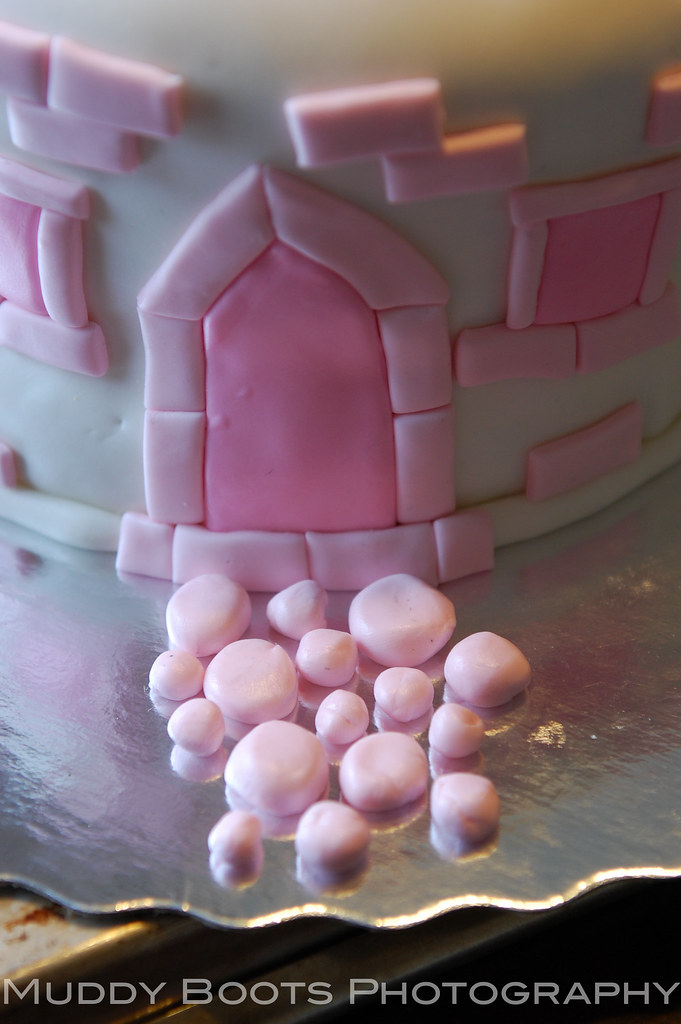
I kneaded the remaining white fondant with a bit of pink food dye (the gel kind intended for cake decorating) and used this to make the door, the little windows and dozens of little pink bricks. When I did Liam's Lego Star Wars cake, I added all of the fondant details with lines of icing... isn't that how they do it on Ace of Cakes? I thought it was, but after this cake, I'm re-thinking that. This time, I used a paint brush dipped in water and it worked SO well and was SO less messy. I'd lay half a dozen little bricks on the palm of my hand, face down, brush them all with water then stick them on. There was no need even to hold them in place. Super easy. I also made little round "stones" to squish into a cobble stone path.

Melo's 4th bday-45

Melo's 4th bday-44

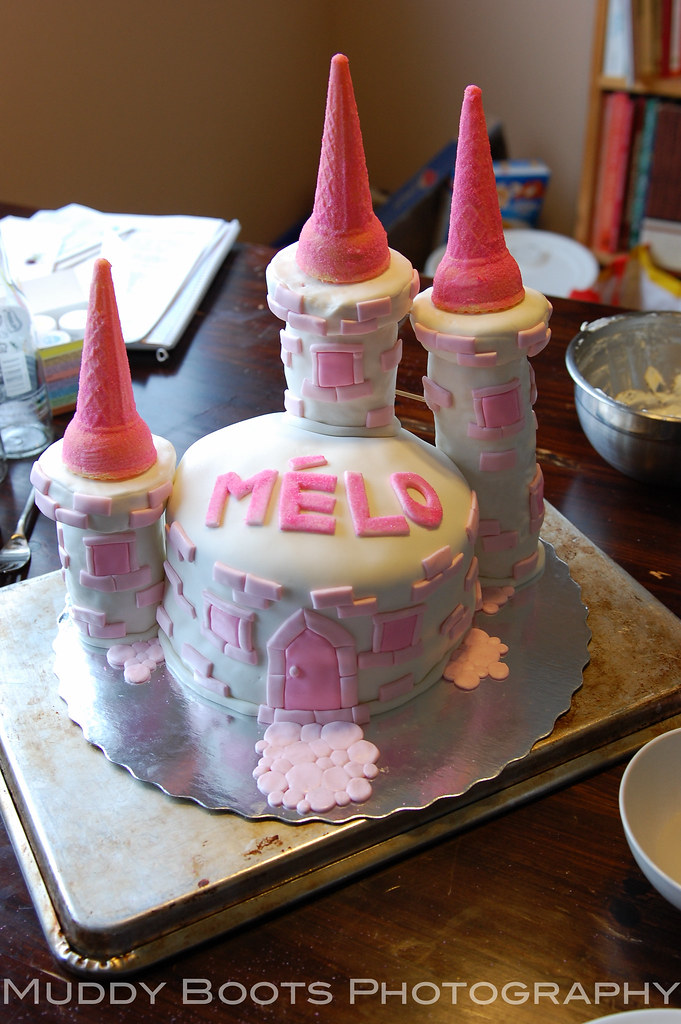
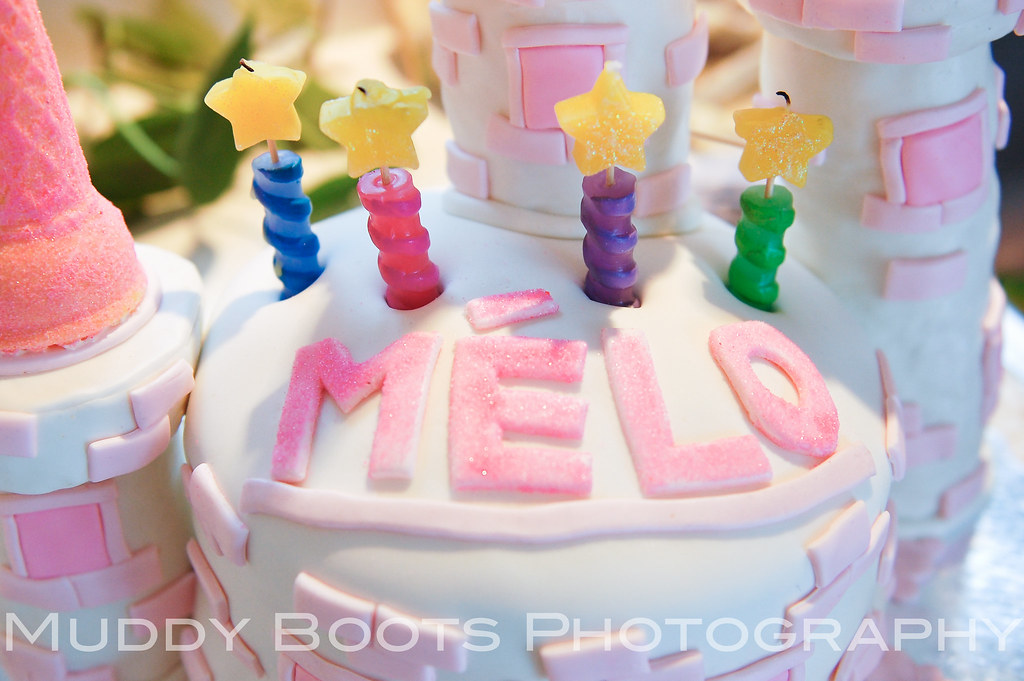
I painstakingly cut out the letters to Mélo's name using the tip of a butter knife... then remembered I have a set of alphabet cookie cutters on the top shelf of my pantry. Nice.

Melo's 4th bday-19
ready to surprise the birthday girl

Melo's 4th bday-18

I'd offered to make this cake for the daughter of my good friend, Valérie. The party was a princess theme (if you hadn't caught that already). Mélo turned four and there's just no more perfect age for an all-out girly princess party, complete with princess dress-up clothes, twirling, dancing, more twirling, costume jewelry, make-up, a tea party, and even a visit from a "real live princess" (someone dressed as Snow White). 

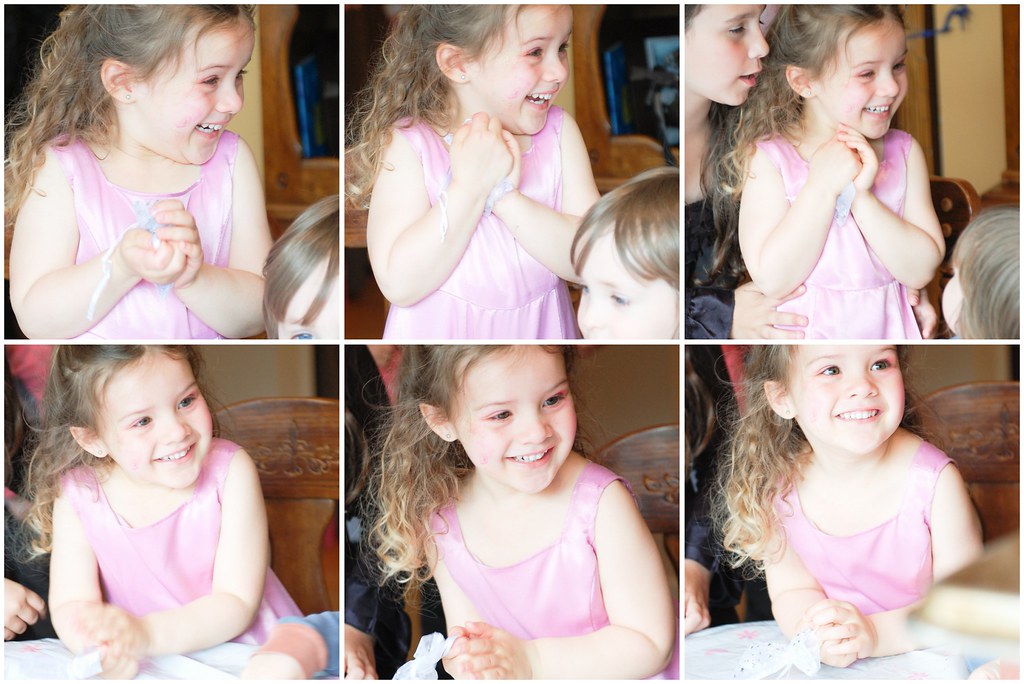
We'd managed to keep the cake out of sight from the time I arrived with it, and I gave her dad the honour of being the one to bring it out to her. Here's her reaction... Priceless right? The bottom left picture is the only one that really shows it, but she was clapping the whole time it was being walked over. 

Clapping and squealing.

cake surprise mosaic

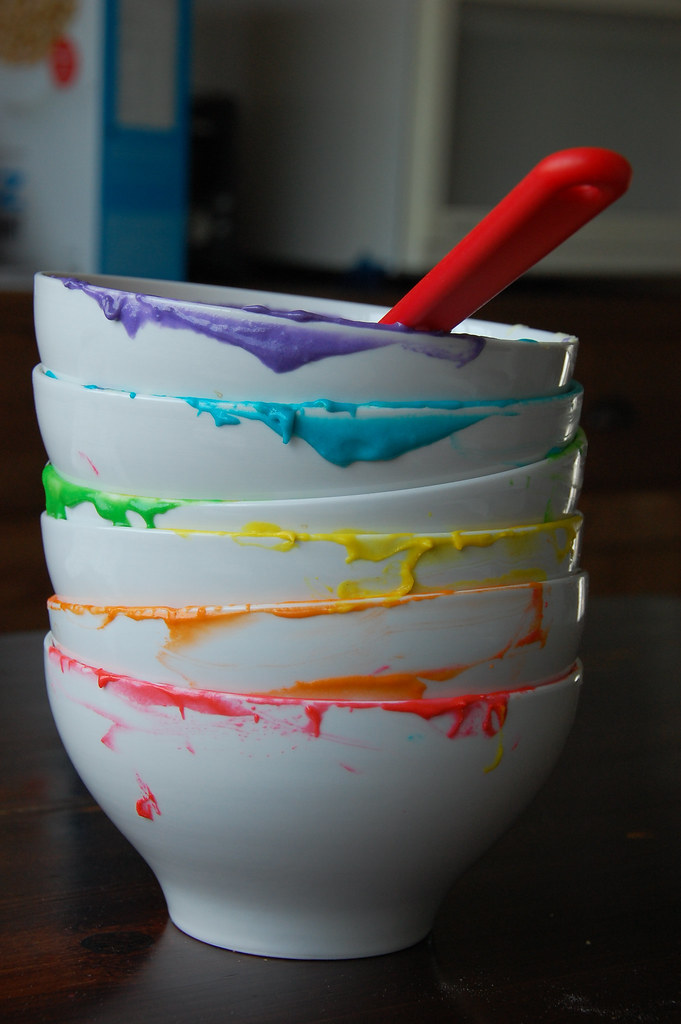
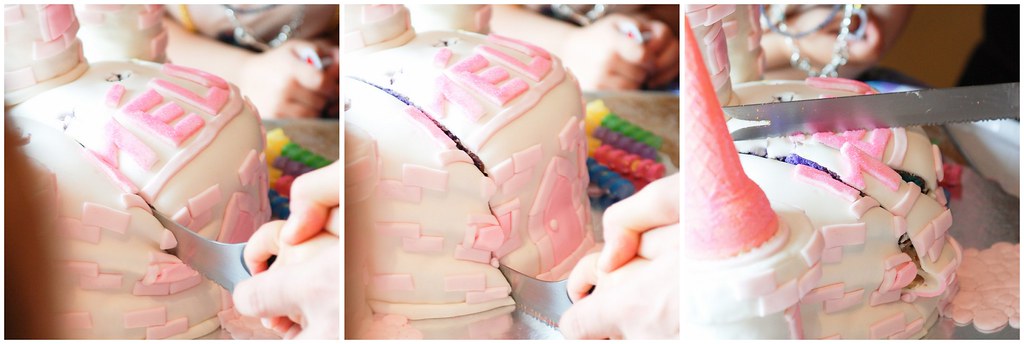
After she blew out the candles, I told her that there was a surprise INSIDE THE CAKE and that she'd have to cut into it to see what it was.

cake cutting mosaic

Melo's 4th bday-8

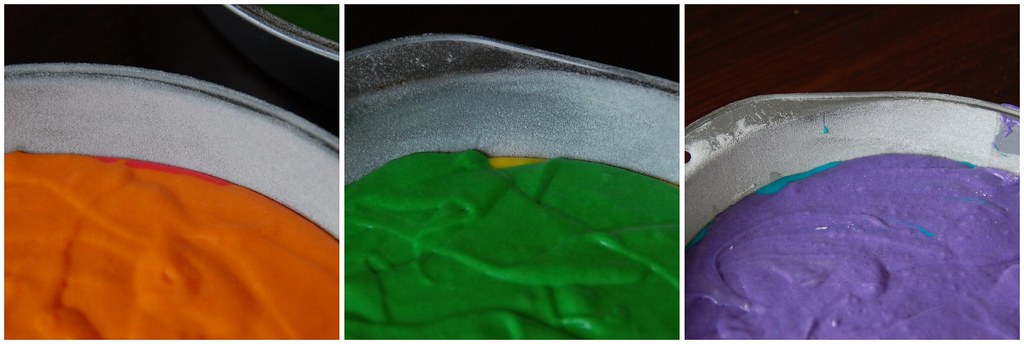
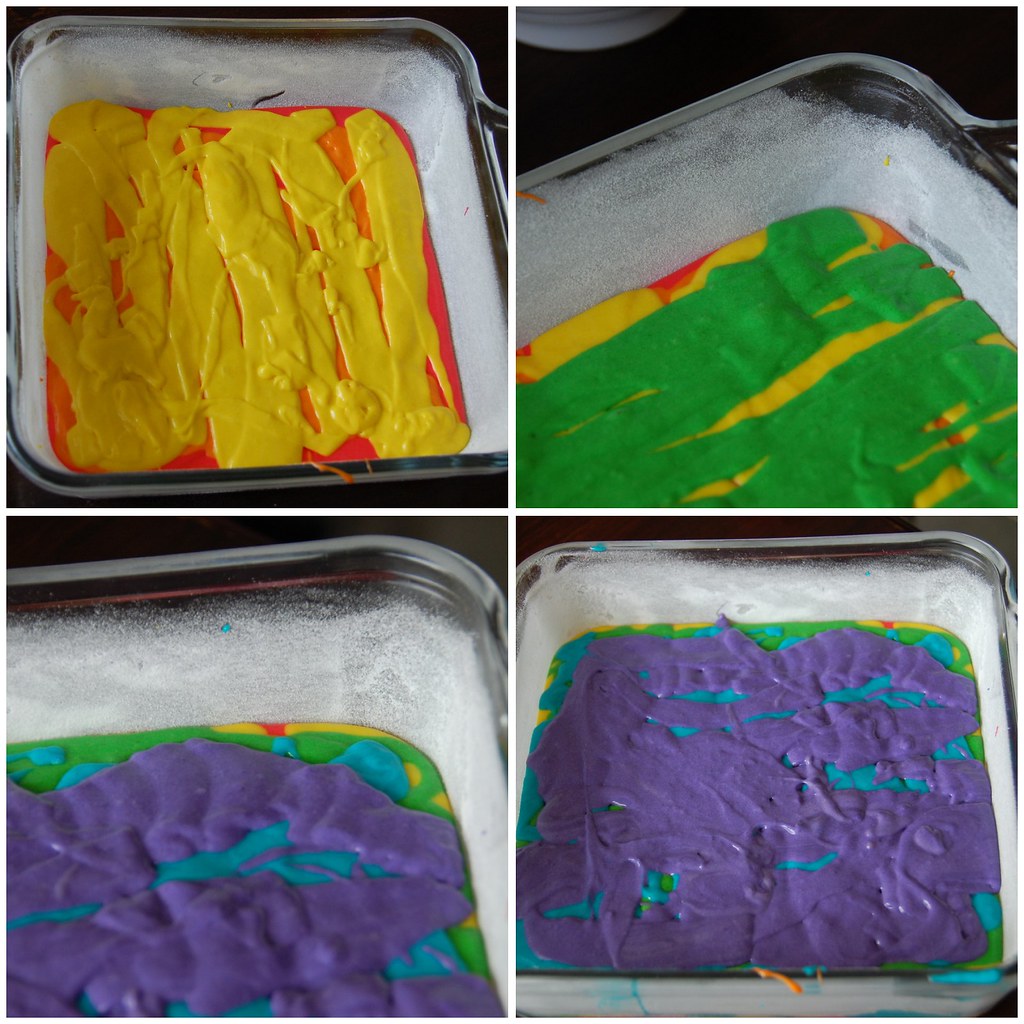
Did you ever see a happier birthday girl? And did you ever see a more shockingly bright cake?? Even with the picture being a bit washed out, it's still amazingly vibrant. She was so, so excited. 

SO EXCITED. 

I will admit that it was a lot of work, but every time I look at those pictures of her face when the cake was brought out, I'm reminded why I did it. You only have one 4th birthday party, and that window of blissful excitement over princesses-and-castles-and-rainbows-and-everything-pink-and-sparkly-and-over-the-top-girly closes WAY too soon.

Happy Birthday, Mélo.

Monday, December 21, 2009

holiday snacking

Last Christmas, I received the book Nourishing Traditions as a gift from myself. One of the recipes/food preparation methods I've added to my kitchen routine is that of soaking and drying nuts. The issue with raw or dry roasted nuts, is that nuts have a high amount of enzyme inhibitors that make them difficult to digest. In nature, these enzyme inhibitors are useful as they prevent nuts/seeds/grains from sprouting and growing prematurely (ie, the middle of a Canadian winter). Unfortunately, the enzymes in our stomachs that digest our food are also effected by these enzyme inhibitors.

Soaking nuts in warm water with a little bit of salt will neutralize the enzyme inhibitors and also help to encourage the production of beneficial enzymes that will help our stomachs digest nuts AND increase the availability of many vitamins (especially B vitamins). The nuts become easier to digest, the nutrients more easier to absorb.

The basic method for soaking nuts:
  • dissolve salt in water
  • pour water over nuts (or seeds) with enough water to cover
  • leave in a warm place (time varies for type of nut)
  • drain and spread on a pan (stainless steal is preferable)
  • place in a warm oven (no warmer that 150 degrees) for specified time
  • turn occasionally until thoroughly dry and crisp
For pecans (my favourite!) the soaking time is at least 7 hours (or even overnight) and it can take between 12-24 hours to completely dry them out.  I know this is more work than just tearing into a bag of roasted pecans, but they are soooo good when soaked and dehydrated. Seriously. It's such an improvement. They're beautiful and buttery and DE.LI.CIOUS.

Nourishing Traditions also contains a recipe for what are called "Holiday Pecans", as opposed to the simple Crispy Pecans as described above. Unfortunately, I couldn't remember the recipe and I didn't lug my copy of the book along to Regina. So this morning, I called Peter and asked if he would write out the recipe and email it to me. Here's what I found in my inbox this afternoon,
Holiday Pecans (makes 4 cups)

4 cups crispy pecan halves
3 egg whites
pinch sea salt
1/2 cup maple syrup
1 Tbsp vanilla extract

Beat egg whites with salt in a clean bowl until stiff. Slowly beat in maple syrup and vanilla. Fold in pecans until well coated. Spread on 2 buttered, stainless steal baking pans and place in a warm oven (no more than 150 degrees) for several hours until the egg white coating hardens. Store in an airtight container in the fridge. Save some for Peter.

Recipe to come... Holiday nuts coated in festive sack.
And my response?
I'm totally re-posting this on my blog. WHERE YOUR MOM WILL SEE IT.

Your loving wife, Amy
It's clear to me that, in the absence of my stable and calming presence, my dear husband has returned to his  pre-parenthood, pre-marriage, PRE-ADOLESCENT self sense of humour. Hopefully I won't have to put up with weeks of fart jokes while he reverts back to his grown up self.

Wednesday, July 22, 2009

wordless wednesday - x-rated food


I swear that Simon created this little masterpiece completely unassisted. He
proclaimed quite proudly that it was his "tower". How could I not take a picture?
Yes, Peter was VERY proud.


For more Wordless Wednesdays, head over to 5 Minutes For Mom and to Wordless Wednesday.

Tuesday, July 7, 2009

how to host a star wars party in 5 excruciatingly painstakingly detailed steps: part 4 - THE CAKE

K, I know this post could use some, well, WORDS, but it's late and I'm lazy tired and I just want to get them published before blogger eats another of my posts.

CAUSE I REALLY NEED ONE MORE REASON TO WANT TO JUMP THE BLOGGER SHIP.

(deep breath)

I promise to be back with some wordy instructions later tomorrow. There are definitely some gaps in the pictures that I will deftly fill in with words. Promise.


***NOTE: I've since discovered that icing the rice krispie treats is A TOTAL PAIN and completely unnecessary. The fondant will stick just fine without the icing. Also, using icing to stick fondant to fondant is difficult and doesn't even work very well. A small paintbrush dipped in water is amazingly effective. The water makes the fondant stick to itself and you avoid all the messy icing showing behind your work. 


This post links back to Wordless Wednesdays at 5 Minutes For Mom.

Links to how we did it:

pre-party planning and ideas
the invitation how-to
pool noodle lightsabers
marshmallow fondant
the cake (in less than 100 pictures)
the big day

* * * * * * * * * *
Need some party supplies? Want to make your own pool noodle lightsabers? Check these links below and have it all delivered to your door. If you find any of these links are broken or sold out, let me know and I'll find some new sources. Wouldn't the minifigure ice cube trays be fun? They could be used for ice (obviously), chocolate, or even to make Lego man crayons!

Disclosure: I'm a member of the Amazon Affiliates programs. This means that if you purchase an item from a link from this blog to those shops, I will receive an affiliate commission. However, I only share products and services that I would personally use and that I hope will be a good fit for you.