Showing posts with label crafting. Show all posts

Monday, October 4, 2010

Peter's on his own for those four cases of wine we brought with us...

When we got a higher than expected tax return this last April, Peter and I decided to make a batch of wine. The batch we'd made in February of 2009 had lasted us over a year, but had just run out. We ended up splurging and making two batches, one inexpensive one to use for sangria, cooking, etc, and one higher quality one that we could enjoy with a nice meal or when friends were over.

Then we found out we were moving here to Bogota.

baby news-3
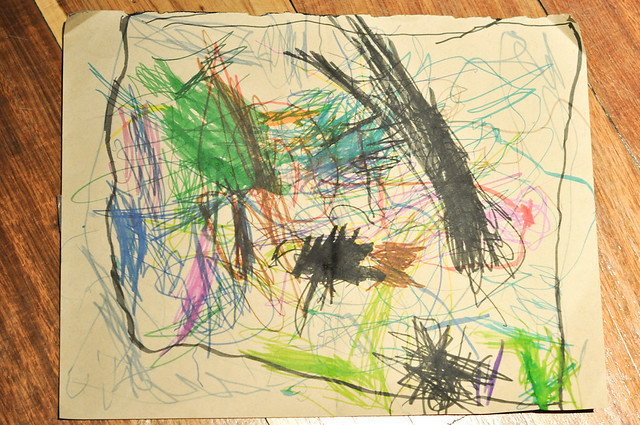
Simon's drawing for daddy

At first we were unsure if we would be able to bring it with us in our air shipment. We were told no one day, then yes the next, then back to no. In the end they allowed us to bring it, but said we'd likely have to pay duty and import taxes on it.

On all 48 bottles.

Imagine our surprise and delight when it all arrived safe and sound and duty-free. Yeah!

Imagine my dismay when I realized that I would not, in fact, be able to enjoy said wine...

...at least not for the next eight months.

baby news-4
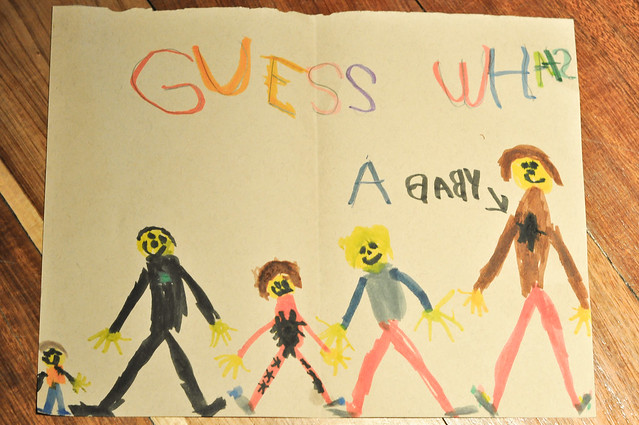
Liam's drawing for daddy

That's right folks! Not to be confused with a black Spiderman symbol, that's actually a baby in my... um... I'm not sure why the baby is in my chest... Nor why I look about four feet taller than Peter, who seems to be channeling the Green Lantern.  I'll clear that up with Liam in a few weeks when we start learning about human anatomy (I'll also try to limit the amount of Justice League he watches).

Those of you who follow me on Twitter are already privy to this information and were of great assistance in helping me come up with a fun way to tell Peter the news. Someone -whose name Twitter won't let me go back and look up! argh!- offered up the fantastic idea of making a shirt that would read, "Made in Colombia". I loved the idea and (although it took me a day to find the blank shirt I knew I had in "a box somewhere" and two days to cut out and hand-stitch all the letters on) love the final product even more.

baby news-1

baby news-2
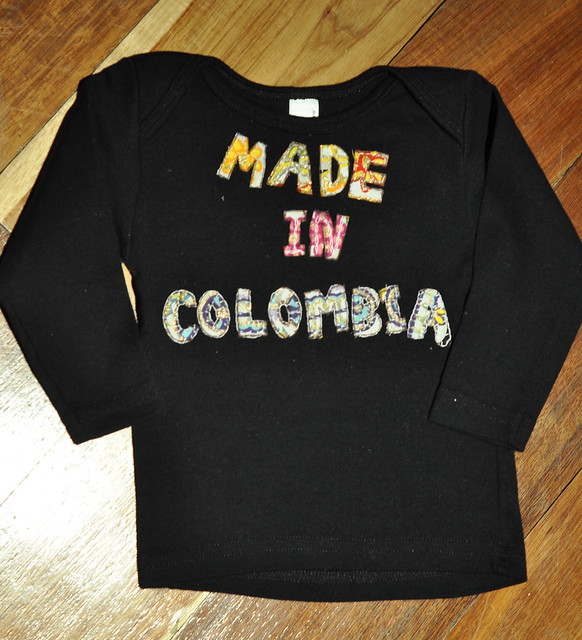
Sorry for the crummy pics. I took them at night under halogen light.

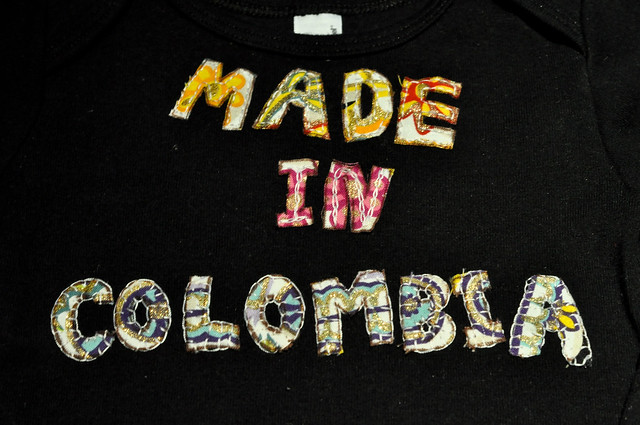
I know it's a bit wonky, but stitch quilters cotton onto a ribbed knit is easier said than done. I don't mind it though. It's clearly handmade. I wasn't trying to fool anyone.

(The fabric for those interested is a rad print from Alexander Henry called Dia de los Muertos or Day of the Dead or Sugar Skulls. I love it and have it in three colourways. Here's a link to a pic of the full fabric.)

If you're wondering, this came as a HUGE SHOCK. Seeing as I wasn't able to become -or stay- pregnant with either Simon or Andrew without the help of hormone supplements, we really didn't even think it was a possibility. Even with that knowledge though, we still always play it pretty safe (not safe enough, clearly). And while I did always want to have at least one more baby at some point, it was not really in my plan for this year.

It was not AT ALL in Peter's plan.

So like a good and compassionate wife, I filmed him while he was opening the boys' cards and the little shirt I made. I haven't had the chance to upload the video yet, but it'll be worth the wait. I promise. I can tell you that in includes the lines, "Shut up!" "Are you kidding me?!?" and "Turn that thing off."

Good stuff.

So yeah. In eight short months we will be Bundys plus one. A family of six. Wow, thinking that still makes my head spin.

Now to figure out what to do about all my maternity clothes and baby stuff being thousands of miles away locked in storage...

Tuesday, September 21, 2010

Star Wars party ideas


Those who've been reading my blog for a while will likely remember the series I did on the Star Wars Lego party we threw for Liam's 6th birthday. Although that series -aptly entitled "How to Host a Star Wars Party in 5 Excruciatingly, Painstakingly Detailed Steps"- has much more detailed how-to information, here's the nitty gritty:

My initial plan involved creating themed invitations, making pool noodle lightsabers, a Death Star pinata, kicking around a Death Star beach ball, and giving out Clone Wars kites in lieu of goodie bags, as well as letting each child take home a lightsaber. That summer, there was Clone Wars merchandise all over the place, so that made things easier.

Step 2: The Invitation
By taking and merging several screen shots from the Lego.com site, I was able to put together a truly awesome invitation, that I'm just now realizing was hosted on a photo site that I let lapse. Oops. But trust me, it was AWESOME.

Truly a labour of love, these lightsabers took me hours to complete. Each was different. Each was super detailed. Each involved painstakingly cutting out tiny strips and squares of electricians tape and duct tape. But they, too, were awesome. 
DSC_0198 edit

Part 4: The Fondant
This cake required fondant to decorate properly. It was my first try making marshmallow fondant and I loved not only the process, but also the result. It's much easier than it looks, and each subsequent attempt became easier and the result more impressive. Plus, you can't go wrong with kids and taking sugar (the marshmallows), adding more sugar and then covering a sugar-filled cake... AND THEN SENDING THEM HOME.


Part 5: The Cake
For a full step-by-step of how I constructed this cake, you'll have to click on the link above. For now, a few pictures will have to suffice.


next to my then 4 1/2 month old

Part 6: The Pinata
For the Pinata, we simply made a (wonky shaped) ball by covering a balloon with papier mache. We probably put seven or eight layers of paper on it, each time letting it dry hanging on the clothes line. I was most worried about how we would hang it and how to make it strong enough to let the kids all have a few whacks at it. In the end, it was plenty strong enough. We painted it with two shades of grey paint, then let Liam do the final detail. I love how it turned out!


In the end, it was a lot of work beforehand, but the day of the party was relatively stress-free and it was all worth it in the end. All of the guest had a super fun time and the birthday boy was made to feel love and special and celebrated.


TOTALLY worth it.
Links to how we did it:

pre-party planning and ideas
the invitation how-to
pool noodle lightsabers
marshmallow fondant
the cake (in less than 100 pictures)
the big day

* * * * * * * * * *
Need some party supplies? Want to make your own pool noodle lightsabers? Check these links below and have it all delivered to your door. If you find any of these links are broken or sold out, let me know and I'll find some new sources. Wouldn't the minifigure ice cube trays be fun? They could be used for ice (obviously), chocolate, or even to make Lego man crayons!

Disclosure: I'm a member of the Amazon Affiliates programs. This means that if you purchase an item from a link from this blog to those shops, I will receive an affiliate commission. However, I only share products and services that I would personally use and that I hope will be a good fit for you.

Friday, May 28, 2010

two things with sexy legs

Even though I still have so much to blog about Peter's parent's visit (I'm overwhelmed by the amount of pictures to go through!), I wanted to quickly post this "before" picture of a couple of pieces of furniture I picked up off of kijiji last week. The seller had bought an amazing house right in downtown Ottawa that was furnished. 

With pieces he didn't want. 

With pieces that he clearly didn't realize -or care- the value of. Or maybe he just wanted them gone quickly. Either way...

Lucky me.

I have big plans for these two.

The first, while not an antique (it has a magnetic clasp and some fancy hardware inside), has a super nice shape... and check out those sexy legs! Can a piece of furniture be sexy, you ask? Clearly, the answer is yes.

kijiji furniture-1
Sorry the top is so dusty, I'd already begun sanding before remembering to run get my camera. 
(Also, see that pile of rock? We built a deck last week.) 
(And by "we built a deck", I mean that Peter and his dad slaved for 12-14 hours a day building a deck.)
(It's a life-changing deck.)
(More on that later.)

And now... what you all really came to see...

Could this dresser be any more awesome?? And it was only $40! 

kijiji furniture-2

(I know that some people visiting here might live in an area where antiques like this sell for $10-$15, so might shrug at my excitement over this $40 dresser (*ahem* sorry mom... this CHEST OF DRAWERS), but I assure you that -for here- this is an amazing deal. I read some US-based blogs that seem to be based in a parallel universe where it rains antiques and everywhere you look people are practically giving away timeless treasures covered in charming rust and patina and age worn paint. THIS IS NOT THAT PLACE. )

kijiji furniture-4
signs of age and use

kijiji furniture-3
unique detail

kijiji furniture-5
and just look at those curves

Every time I see those curves (THOSE CURVES!), I'm torn between sighing contentedly that she's mine-all-mine and giving a big ol' construction worker wolf howl.

kijiji furniture-2

It wasn't until after taking these pictures that I noticed that the hardware doesn't match. When I started this post, I thought I'd just pop over to Lee Valley's site and find a couple options to post here... Uh, have you ever checked out the hardware section of Lee Valley?  I hadn't. It's a bit overwhelming! If any of you painting/decorating/refinishing mavens have ideas, I'd love to hear them. 

At first I was thinking of doing something similar to what's on there, like some of these on the left hand side,

But maybe I should fill the holes and go for some drop pulls (the ones in the middle above), like on this dresser by Holly from Life in the Fun Lane (her before and after)

Cute, right?

This will be my first attempt at refinishing furniture and I get all giddy even thinking about it. From the great price, to the labour put into it, to the time spent choosing the little details, this dresser is going to have a lot of me in it.

I can't wait to finish and post the end results.

(Hopefully it won't take all summer.)


If you've ever attempted anything similar and have any tips or advice, or if you've written a post about something similar, I'd love to know.

This post is linking up to these great parties.

Furniture Feature Fridays
Decor MammaThe Girl Creative  Blog+Button+to+size.jpg  The Trendy Treehouse

P.S. Now I want my own button. I have button envy.

Monday, May 17, 2010

rainbow cake: part II

This post is for all those wondering how I made the rainbow cake for the princess castle cake I did last weekend. It really wasn't hard, just took some steps. After mixing up the cheapest some simple white boxed cake, I divided the batter into six bowls and mixed a different food colouring into each bowl. Take note that I didn't use your grocery store brand liquid food colouring, but the professional icing colour gels meant for cake decorating (like these). While I'm not normally a fan of food dye (especially for kids), there's just no way to get these kinds of vibrant colours with natural dyes.

They're even brighter when cooked. Serious.

rainbow cake-1

rainbow cake-2
these pictures weren't edited at all (not even white balance... ugh. sorry.)

It would've been better to bake each colour individually so I'd end up with six half cakes, but I only had to round pans and I didn't feel like spending all afternoon in the kitchen, pouring, filling, levelling, baking, cooling, removing, re-greasing, re-pouring... you get the picture. So instead I did two colours per pan. Below you can see a bit of the first colour peeking through around the edges.

rainbow cake mosaic I

Since two boxes of cake batter should have made four cakes, but I was only using three, I didn't want to fill the pans right up for fear of cleaning -albeit cheerfully coloured- cake batter out of the bottom of the oven. I used the leftover batter to make a square cake, pouring each layer into the pan as evenly as possible. I thought I might need this extra cake to build/repair parts of the castle, or if we needed extra cake for extra people, but ended up taking it to church where it was inhaled by some very excited, very amazed 3-9 year olds.

rainbow cake mosaic II

rainbow cake-10
messy and pretty at the same time

Melo's 4th bday-44Melo's 4th bday-8

The layers of rainbow cake made up the main body/section of the castle, while the towers were made of rice krispie treats. All in all, it was, yes a bit of work, but also a huge success.